No posts yet. Check back soon!
%22/%3E%0A%20%20%3Ctext%20x=%2250%22%20y=%2250%22%20text-anchor=%22middle%22%20dy=%22.35em%22%0A%20%20%20%20font-family=%22system-ui,%20sans-serif%22%20font-weight=%22700%22%0A%20%20%20%20font-size=%2238%22%20fill=%22white%22%3ESH%3C/text%3E%0A%3C/svg%3E)
I don't know why hardware manufacturers find it so hard to write decent documentation. As I've said before you need to actually test your readme. The Una Watch development instructions are scattered across a bunch of different files.
So here's how to go from zero to your first "Hello, World!" Glance app with the minimum of fuss.
This all assumes a fairly modern Debian / Ubuntu / Pop OS Linux.
Prerequisites
This installs most of the tools you will need:
sudo apt update
sudo apt install -y git python3 python3-pip cmake build-essential
STM32CubeCLT
Visit https://www.st.com/en/development-tools/stm32cubeclt.html and download the Linux version of the tool. Inexplicably, you need to give your email address. I recommend giving a disposable one from https://10minutemail.com/
After downloading, unzip the file.
On the command line, cd into the directory containing the unzipped file.
chmod +x stm32cubeclt_*.sh
sudo ./stm32cubeclt_*.sh
You will need to agree to their licence. Just hit y.
That installs everything in /opt/st/stm32cubeclt_1.22.0/
You will need to make that available to your PATH.
export PATH="/opt/st/stm32cubeclt_1.22.0/GNU-tools-for-STM32/bin:$PATH"
Clone the repo
You will need to copy the Una SDK. I keep my git repos in ~/git/ - you will need the location of the directory later.
cd ~/git/
git clone git@github.com:UNAWatch/una-sdk.git
cd una-sdk/
git submodule update --init ThirdParty/lvgl
Then update all the Python dependencies.
export UNA_SDK="$PWD"
python3 -m pip install --upgrade pip
python3 -m pip install -r "$UNA_SDK/Utilities/Scripts/app_packer/requirements.txt"
Check it has all worked
Paste this into your terminal. Check for any errors.
which arm-none-eabi-gcc || true
which cmake || true
which make || true
which python3 || true
python3 -m pip --version
arm-none-eabi-gcc --version || true
cmake --version || true
make --version || true
Build the demo app
If all of the above has worked, you should be able to build the demo app with:
cd /tmp
mkdir -p MyAlarm
cp -r "$UNA_SDK/Examples/Apps/Alarm/"* MyAlarm
mkdir -p MyAlarm/build
cmake -G "Unix Makefiles" -S MyAlarm/Software/Apps/Alarm-CMake -B MyAlarm/build
cmake --build MyAlarm/build
Make it permanent
Store the paths permanently. If you put cloned the Una SDK to somewhere other than ~/git/ you'll need to edit this next bit of code:
echo 'export UNA_SDK="$HOME/git/una-sdk"' >> ~/.bashrc
echo 'export PATH="/opt/st/stm32cubeclt_1.22.0/GNU-tools-for-STM32/bin:$PATH"' >> ~/.bashrc
source ~/.bashrc
Build a Glance app
At the moment, the only way to build a GUI app is using the Windows only (Booooo!) TouchGFX0. So, instead, we'll make a "Hello World" glance. All it will do is draw some text.
The GlanceFloors demo app is the simplest one to copy.
cd $UNA_SDK/Examples/Apps/
cp -r  GlanceFloors/ GlanceHello
Use an IDE or a text editor to open up the new GlanceHello directory.
- Rename the directory
GlanceHello/Software/App/GlanceFloors-CMake/toGlanceHello/Software/App/GlanceHello-CMake/ - Edit the file
GlanceHello/Software/App/GlanceFloors-CMake/CMakeLists.txt- specifically the# App configurationsection. - Change the
APP_NAMEtoGlanceHello - Change the
APP_USER_NAMEtoHello
For a demo, you can leave the DEV_ID and APP_ID as their default values.
Minimum viable app
You will need to edit two more files.
In GlanceHello/Software/Libs/Header/Service.hpp remove the following lines:
SDK::Sensor::Connection mSensorFloors;
uint32_t                mFloorsValue;
bool                    mDataReceived;
Then save the file.
Edit GlanceHello/Software/Libs/Source/Service.cpp and replace its entire contents with this:
#include "Service.hpp"
#include "SDK/Messages/CommandMessages.hpp"
#include "SDK/Messages/MessageGuard.hpp"

Service::Service(SDK::Kernel &kernel)
    : mKernel(kernel)
    , mGlanceUI()
    , mGlanceTitle()
    , mGlanceValue()
{}

Service::~Service(){}

void Service::run()
{
    while (true) {
        SDK::MessageBase *msg;
        if(!mKernel.comm.getMessage(msg)) {
            continue;
        }

        switch (msg->getType()) {

            case SDK::MessageType::EVENT_GLANCE_START:
                if (configGui()) {
                    createGuiControls();
                } else {
                    mKernel.comm.releaseMessage(msg);
                    mKernel.sys.exit(0);
                }
                break;

            case SDK::MessageType::COMMAND_APP_STOP:
            case SDK::MessageType::EVENT_GLANCE_STOP:
                mKernel.comm.releaseMessage(msg);
                return;
                break;

            case SDK::MessageType::EVENT_GLANCE_TICK:
                onGlanceTick();
                break;

            default:
                break;
        }

        mKernel.comm.releaseMessage(msg);
    }
}

void Service::onGlanceTick()
{
    if (mGlanceUI.isInvalid()) {
        if (auto upd = SDK::make_msg<SDK::Message::RequestGlanceUpdate>(mKernel)) {
            upd->name           = APP_NAME;
            upd->controls       = mGlanceUI.data();
            upd->controlsNumber = static_cast<uint32_t>(mGlanceUI.size());
            upd.send(100);
        }

        mGlanceUI.setValid();
}
}

bool Service::configGui()
{
    bool status = false;
    if (auto gc = SDK::make_msg<SDK::Message::RequestGlanceConfig>(mKernel)) {
        if (gc.send(100) && gc.ok()) {
            if (gc->maxControls >= 3) {
                mGlanceUI.setWidth(gc->width);
                mGlanceUI.setHeight(gc->height);
                status = true;
            }
        }
    }
    return status;
}

void Service::createGuiControls()
{
    mGlanceTitle = mGlanceUI.createText();
    mGlanceTitle.pos({ kTitleX, kTitleY }, { kTitleW, kTitleH })
        .font(GlanceFont_t::GLANCE_FONT_POPPINS_SEMIBOLD_20)
        .color(GlanceColor_t::GLANCE_COLOR_TEAL)
        .setText("Hello, World!")
        .alignment(GlanceAlignH_t::GLANCE_ALIGN_H_CENTER);
    mGlanceValue = mGlanceUI.createText();
    mGlanceValue.pos({ 0, kValueY }, { 200, kValueH })
        .font(GlanceFont_t::GLANCE_FONT_POPPINS_SEMIBOLD_20)
        .color(GlanceColor_t::GLANCE_COLOR_WHITE)
        .setText("I know C++")
        .alignment(GlanceAlignH_t::GLANCE_ALIGN_H_CENTER);
}
Save the file.
Compile it
On the command line
cd $UNA_SDK/Examples/Apps/GlanceHello/Software/App/GlanceHello-CMake
cmake -G "Unix Makefiles" -S . -B build
cmake --build build
It should finish with a success message of [100%] Built target GlanceHelloApp
Copying it to your watch
- Plug your watch into your computer with a USB-C cable.
- On your computer, open the watch's filesystem.
- Open the
Appsdirectory. - Create a new directory.
- Name the new directory with the string of characters from the
APP_IDwhich is set inCMakeLists.txt - The app is stored in
GlanceHello/Output/and will be calledHello_1.5.0-rc5.uappor similar. - Copy the
.uappfile from your computer to the directory you just created on the watch. - Eject the watch.
- Unplug the cable.
- Restart the watch by pressing the "Up" button until you get to "Power Off", then press "Select", then press "Select" again.
- Turn the watch on by holding down "Select".
- Once the watch has fully restarted, press the "Down" button until you see the "Hello" glance.
If it has worked, you should see something like this:
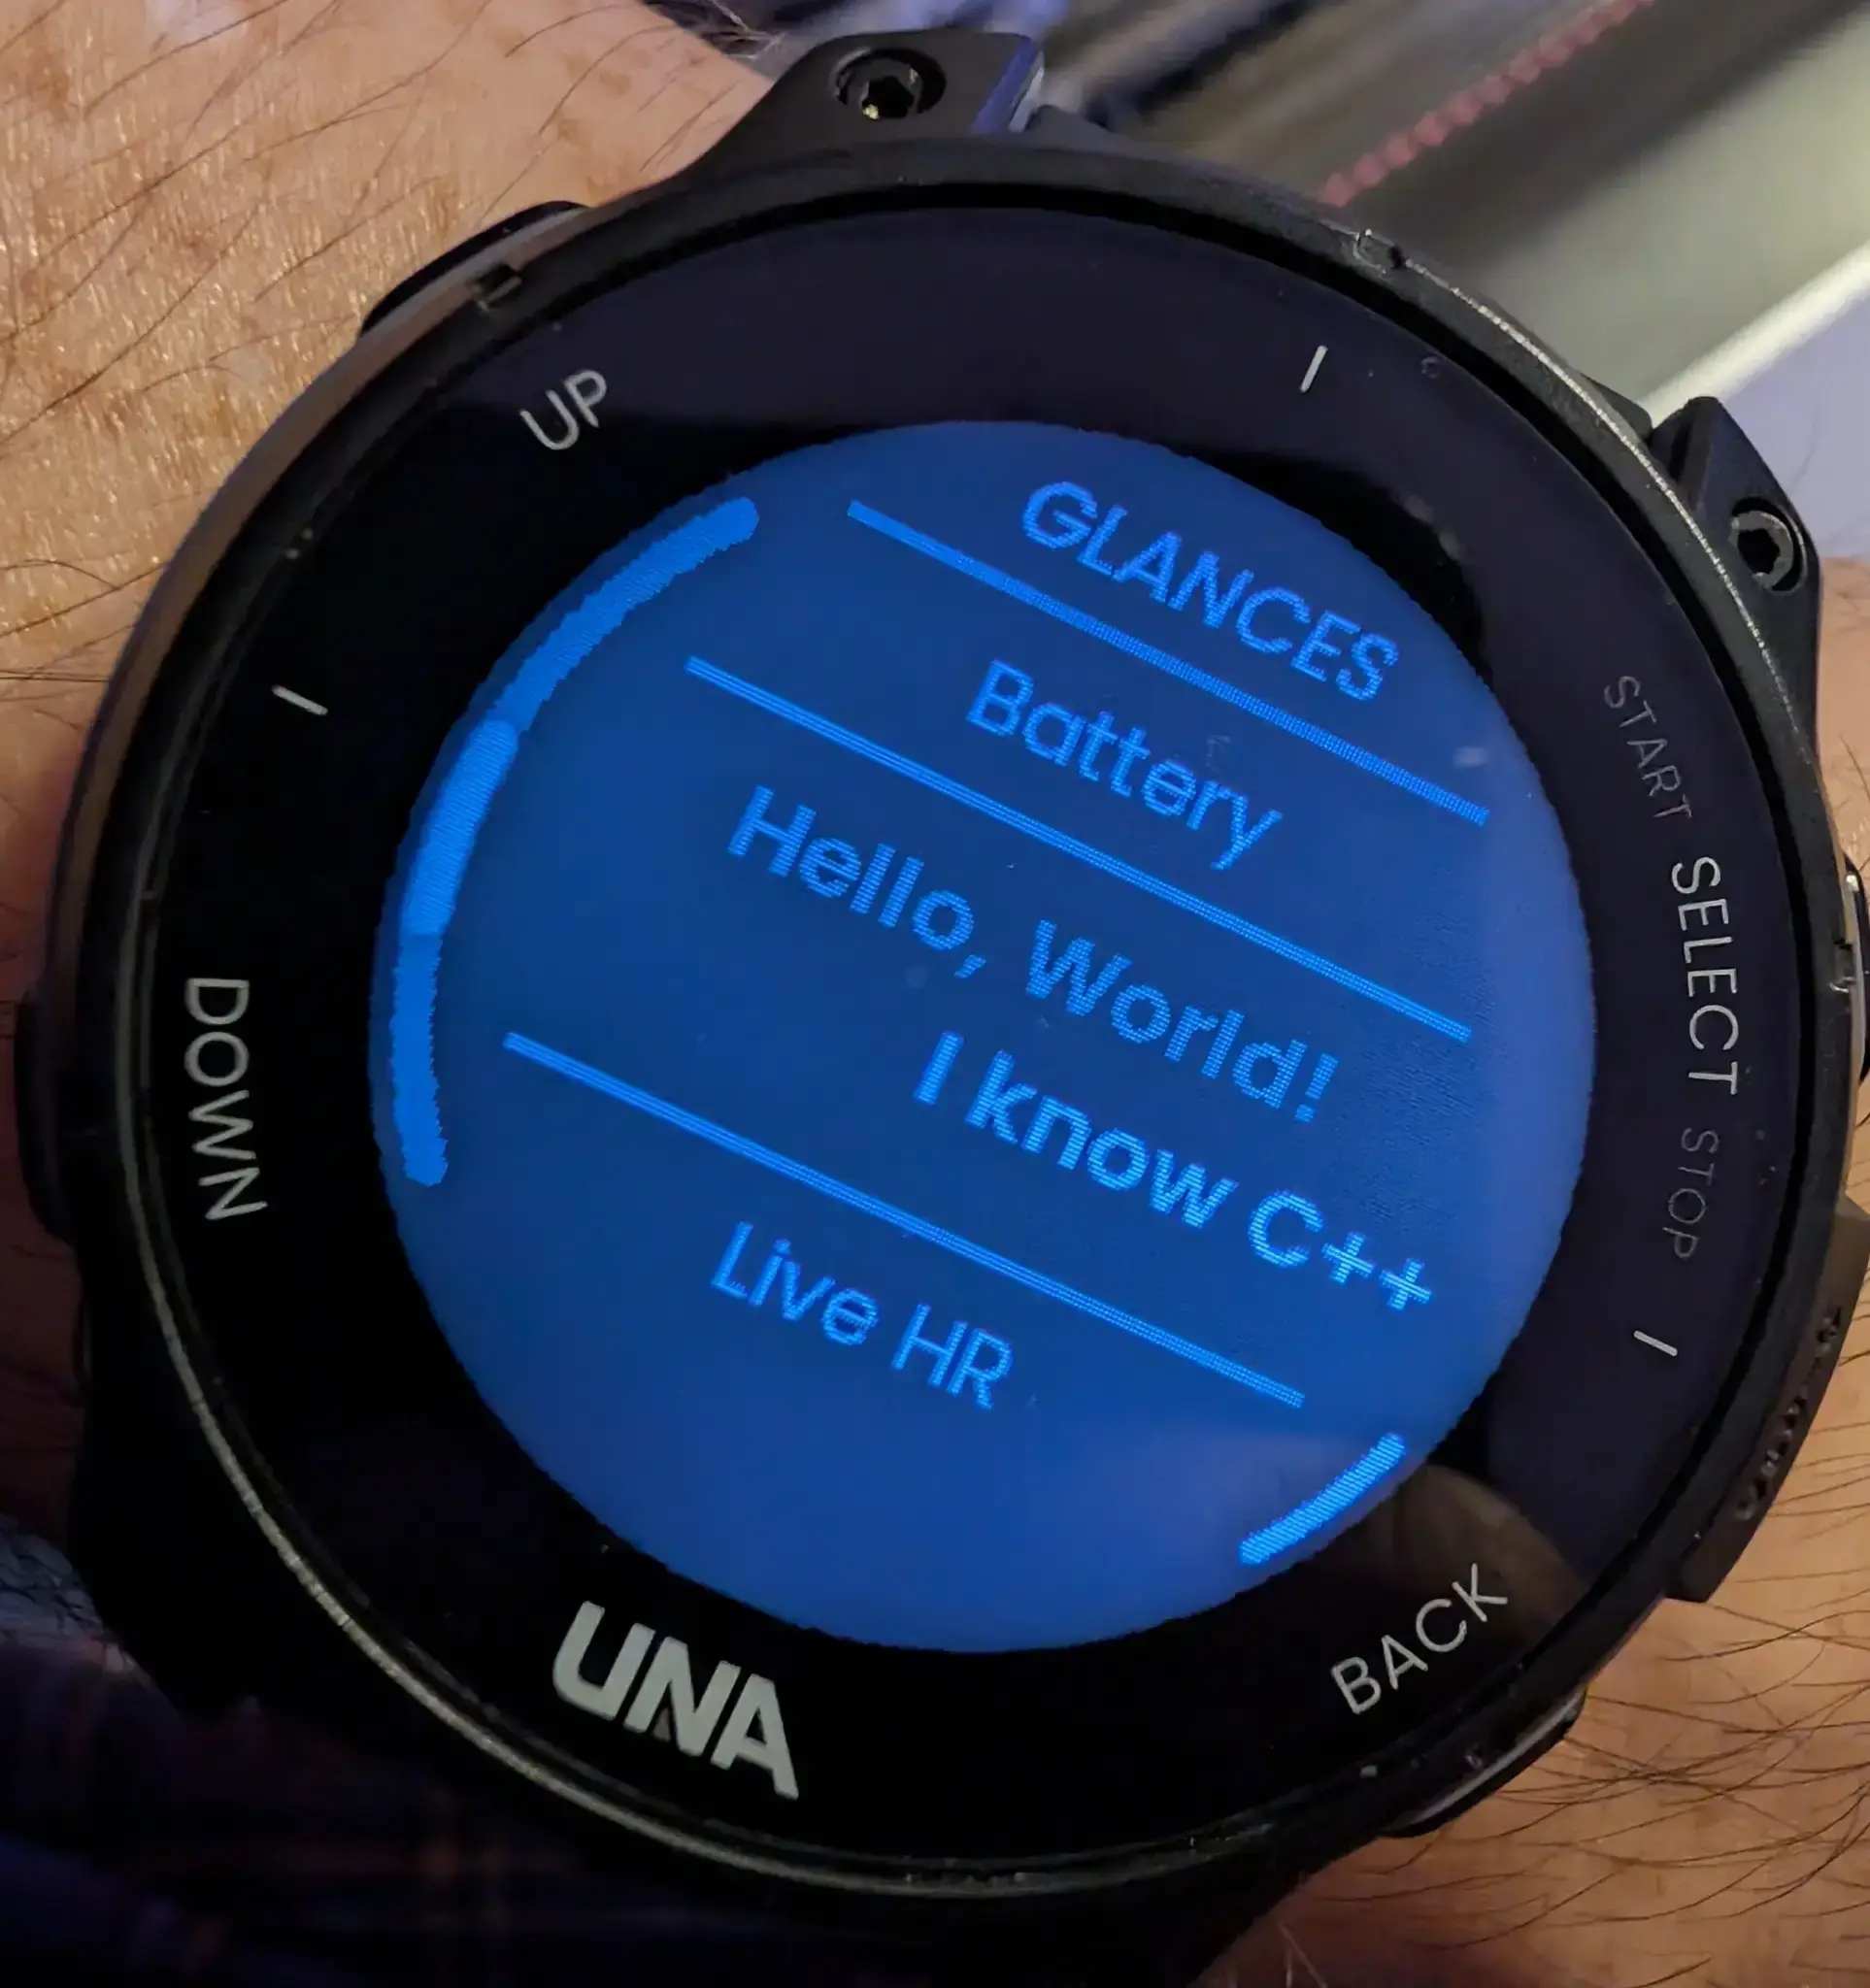
Hurrah! Treat yourself to a beer 🍻
